Picturenook Layouts Guide
For Web Designers
This guide is about how to create your own layouts for Picturenook™.
We'll start from simple html page design for web gallery and turn it into Picturenook™ layout for creating web galleries in next chapters, step by step.
To start with, we'll suppose that you've designed html page for web gallery, which can be found at
introduction/newlayout/index.htm.
In folder introduction/newLayout you can also find images and css file for index.htm.
Tip
You can find all files referred in this manual in manual subfolder at Picturenook™
installation folder, usually it is C:\Program Files\Asygo\Picturenook\manual.
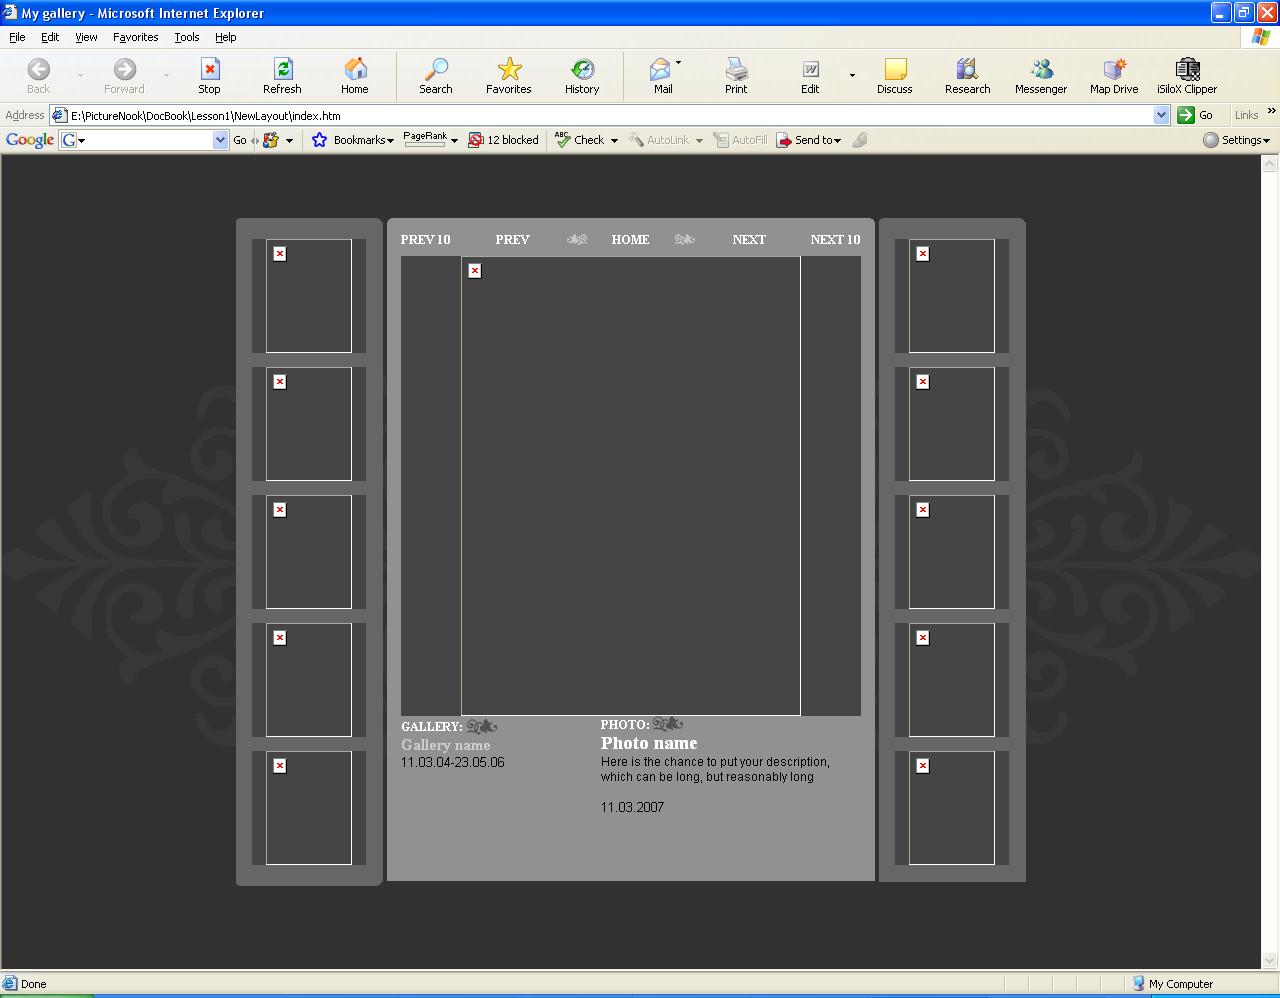
If you open index.htm in Internet Explorer, you will get picture similar to this
As you can see, this design has some common elements, you may expect to encounter in any web gallery. Among them are:
- main picture
- thumbnails
- navigation
- picture information: name, description, date
- web gallery information: name, description, period, number of pictures
All these elements are supported by Picturenook™. You can find full list in reference below.
This will be our basis for the next chapter
ChapterĀ2.ĀHello, gallery
First, you have to declare your web page as layout. To do so, locate your Picturenook™
installation folder, which usually can be found at C:\Program Files\Asygo\Picturenook\.
After you have found it, open Templates folder and copy NewLayout folder
from previous chapter into Templates folder.
Now you are ready to declare your layout. Create new file in Templates folder
and name it like NewLayout.xml.
Edit xml inside this file.
Sample of the file can be found at hellogallery/files/newlayout.xml.
Replace name element value with whatever you like, in our example this is "My Layout". This name you will see as another
available layout in Picturenook™ Layouts drop-down menu.
Replace folder element value with folder where index.html resides, in our example this is "NewLayout".
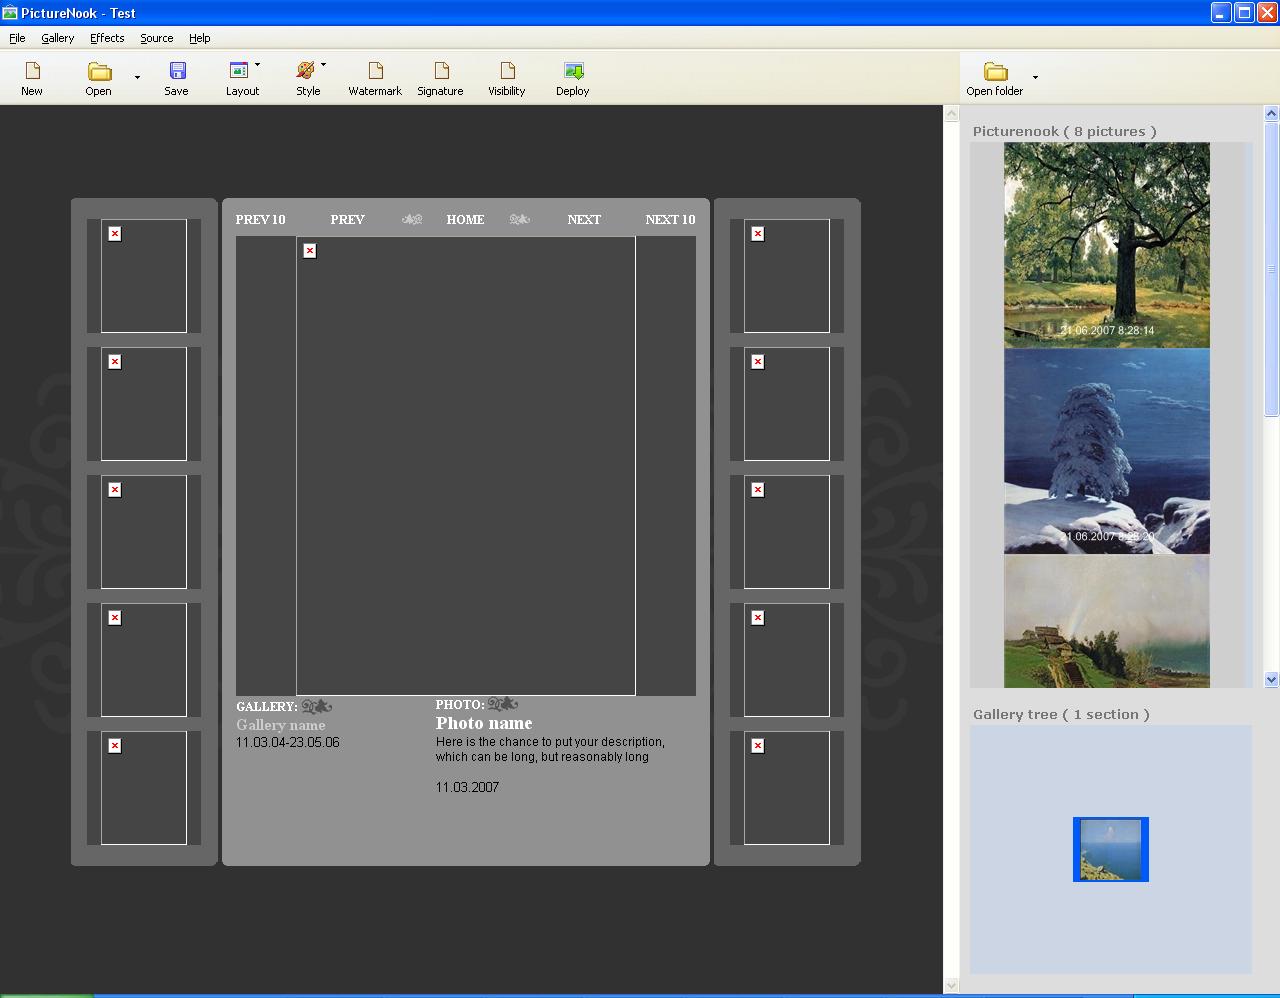
Now run Picturenook™ and see how new layout appears in Layouts drop-down menu.
Choose it. Result should look similar to the picture below.
This will be our basis for the next chapter
Result that you've got during previous chapter has one obvious problem -
the html page do not display images and do not apply styles.
This is because they are, in fact, external files for index.htm.
For Picturenook™ to load them, you have to turn them into layout's "Style".
To do this, at first you have to put all external files into one folder. In our example,
you copy all miscellaneous graphic elements from images folder to css folder,
open index.htm in any editor and change all references from images/ to css/ folder.
Now all external files needed for layout are located in one folder.
Each gallery template can have one or more styles, associated with it.
Style describes visual appearance of template, and contains css file as well as other external files,
usually graphic elements like arrows or buttons.
To make our css folder a "Style", find Styles folder in Picturenook installation folder,
copy css folder there, and rename it to NewStyle
To declare style, create new file in Styles folder
and name it like NewStyle.xml.
Edit xml inside this file.
Sample of the file can be found at
instyle/files/newstyle.xml
.
Replace name element value with whatever you like, in our example this is "My Style". This name you will see as another
available style in Picturenook™ Styles drop-down menu.
Replace folder element value with folder where style.css resides, in our example this is "NewStyle".
The final step is to change index.htm to refer to style, instead of hardcoded css folder
To do so, open index.htm in any editor, find and replace all occurences of css/ string to
<%=page.styledir%>
special value.
The new index.htm can be found here
instyle/newlayout/index.htm.
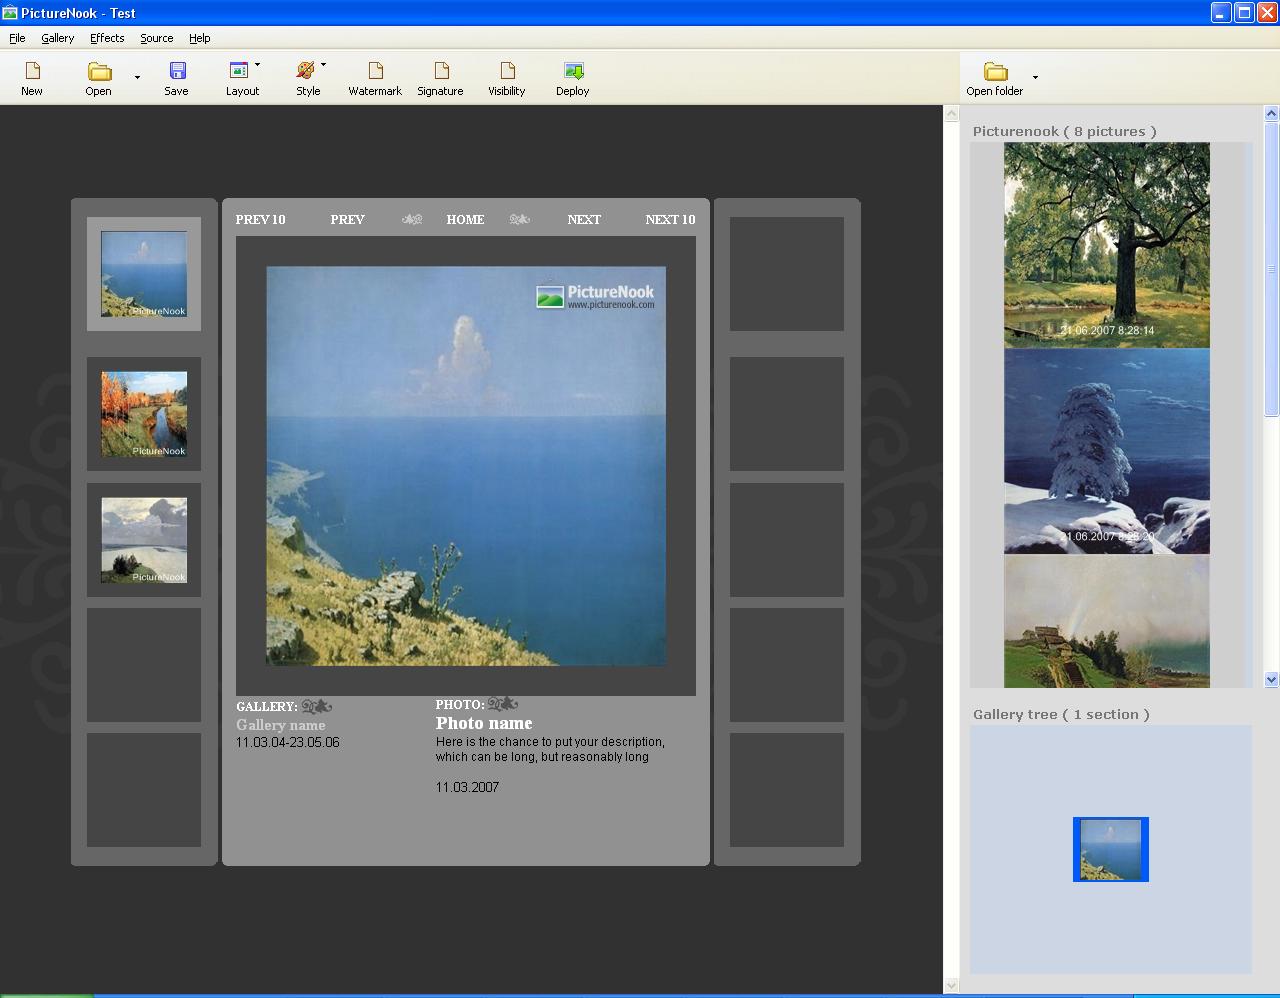
Run Picturenook™, choose "My Layout" from Layouts drop-down menu and choose "My Style" from Styles drop-down menu.
Result should look similar to the picture below.
This will be our basis for the next chapter
ChapterĀ4.ĀMy first picture
You have good-looking layout now. It is time to fill it with pictures.
First, you have to include special element, which drive on page popup menus at design-time.
Just add
<%pageheader%></head>
string right before closing HEAD tag.
Important
If you forget to include it, design-time functionality will be broken.
Second, you have to replace standard "img" html tags with special values.
For main picture on the page, it should be in the form:
<%picture id="main" width="340" height="460" href="<%=main.#index.htm%>"%>
For thumbnails, it should be in the form:
<%picture id="i0" width="86" height="114" image_reference="0" href="<%=i0.#index.htm%>"%>
"id" should start with letter, "image_reference" should contain number, and "href" should be in special form "id_value.#index.htm"
So, in our example you replace all occurences of
<img src="images/thumb5.jpg" width="86" height="114">
to
<%picture id="i0" width="86" height="114" image_reference="0" href="<%=i0.#index.htm%>"%>
...
<%picture id="i9" width="86" height="114" image_reference="9" href="<%=i9.#index.htm%>"%>
incrementing "id", "image_reference" and "href" parts from "i0" to "i9".
Run picturenook and observe the result. It is quite good except one drawback - when you click thumbnail
it become first image on the page. To change it, just add
reference_block_size="10"
to all thumbnail tags. It will tell Picturenook™ that you have ten thumbnails on the page.
<%picture id="i0" width="86" height="114" reference_block_size="10" image_reference="0" href="<%=i0.#index.htm%>"%>
...
<%picture id="i9" width="86" height="114" reference_block_size="10" image_reference="9" href="<%=i9.#index.htm%>"%>
Run picturenook and observe the result. To complete lesson, you have to support thumbnail selection, that is, change of background color around thumbnail of currently viewed picture
Since it is element of style, you have to add it into your css file.
Create new element .selected_border in css file
.selected_border {
  border: 1px none #C6C6C6;
  background-color: #999999;
}
Sample can be found here
myfirstpicture/newstyle/theme5.css
.
To decide whether or not background color for this thumbnail should be changed you have to compare
file name of current picture with file name of picture thumbnail refer to.
to do so, use following construction:
<%if <%isequal property1="<%=i0.file_name%>" property2="<%=main.file_name%>"%> html for selected<%else html%>%>
It can be read as "if property1, which is "i0" picture file name, is equal to property2, which is "main" file name,
insert "html for selected" else insert "html". Now for each "table" tag for thumbnail we use this construction to set it's class to "border" or "selected_border"
depending on compare results. Replace
<table width="114" height="114" border="0" cellpadding="0" cellspacing="0" class="border" >
to
<table width="114" height="114" border="0" cellpadding="0" cellspacing="0"
	class=<%if <%isequal property1="<%=i0.file_name%>" property2="<%=main.file_name%>"%>selected_border<%else border%>%> >
...
<table width="114" height="114" border="0" cellpadding="0" cellspacing="0"
	class=<%if <%isequal property1="<%=i9.file_name%>" property2="<%=main.file_name%>"%>selected_border<%else border%>%> >
Changed index.htm can be found at
myfirstpicture/newlayout/index.htm
.
Run picturenook, now you should be able to add pictures to your gallery. Result should look similar to the picture below.
This will be our basis for the next chapter
ChapterĀ5.ĀGallery Navigation
New layout is missing navigation links like "prev", "next", "home", etc. It's time to make them live.
And again, to make them live, you need to replace them with special form of hyperlinks.
For "prev" and "next" button, just make them like this:
  <a href="<"%relative_page_block position="-10"%>">PREV 10</a>
  <a href="<"%relative_page_block position="-1"%>">PREV</a>
  <a href="<"%relative_page_block position="1"%>">NEXT</a>
  <a href="<"%relative_page_block position="10"%>">NEXT 10</a>
Important
Note that "-10" corresponds to overall number of thumbnails on the page.
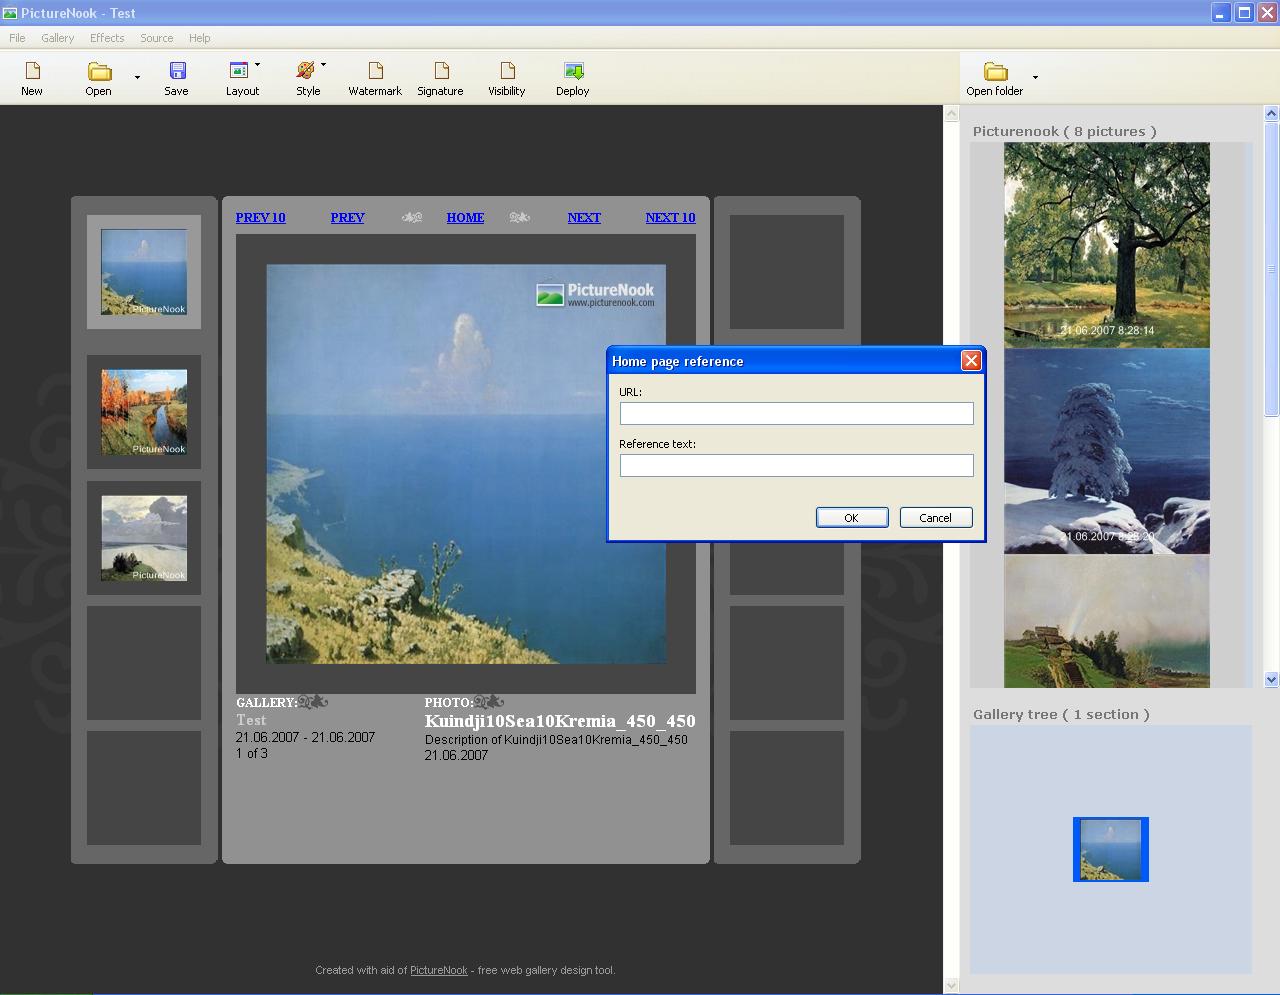
For "home", since it is (probably) an arbitrary text link, you make it a special "textref" element:
<%textref id="home_ref" name="Home page reference" default_href="<"%=gallery.parent_url%>" href_property="gallery.home_href" text="gallery.home_text" default_text="HOME" %>
"textref" element allows user to change hyperlink at design-time. Note that you have to provide some default text for "textref", in our case, no surprises, it is "HOME".
Changed index.htm can be found at
gallerynavigation/newlayout/index.htm
.
Run picturenook, now you should be able navigate gallery using "prev" and "next" links and edit "HOME" link. Result should look similar to the picture below.
This will be our basis for the next chapter
Now you will learn how to add various information elements, like gallery and picture names, pictures count and so on.
To add these elements you will use "textspan" element.
To add gallery name, replace "Gallery Name" text with the following:
<%textspan name="Gallery name" property="gallery.display_name" default="<"%=gallery.name%>"%>
To make "GALLERY:" caption changeable, replace "GALLERY:" text with the following:
<%textspan name="Gallery caption" property="gallery.caption" default="GALLERY:"%>
To add gallery period, which is based on pictures file creation date, replace "11.03.04-23.05.06" with the following:
<%textspan name="Pictures period" property="gallery.period" default="<%=content.min_creation_date%> - <%=content.max_creation_date%>"%>
To make text unchangeable, like you probably want to do for total pictures count, instead of declaring it as textspan, use just value.
<%=page.number%> of <%=content.images_count%>
This will give as static text like "3 of 32"
Now you repeat the same for the picture information block
Replace "PHOTO:" text with
<%textspan name="Photo caption" property="gallery.photo_caption" default="PHOTO:"%>
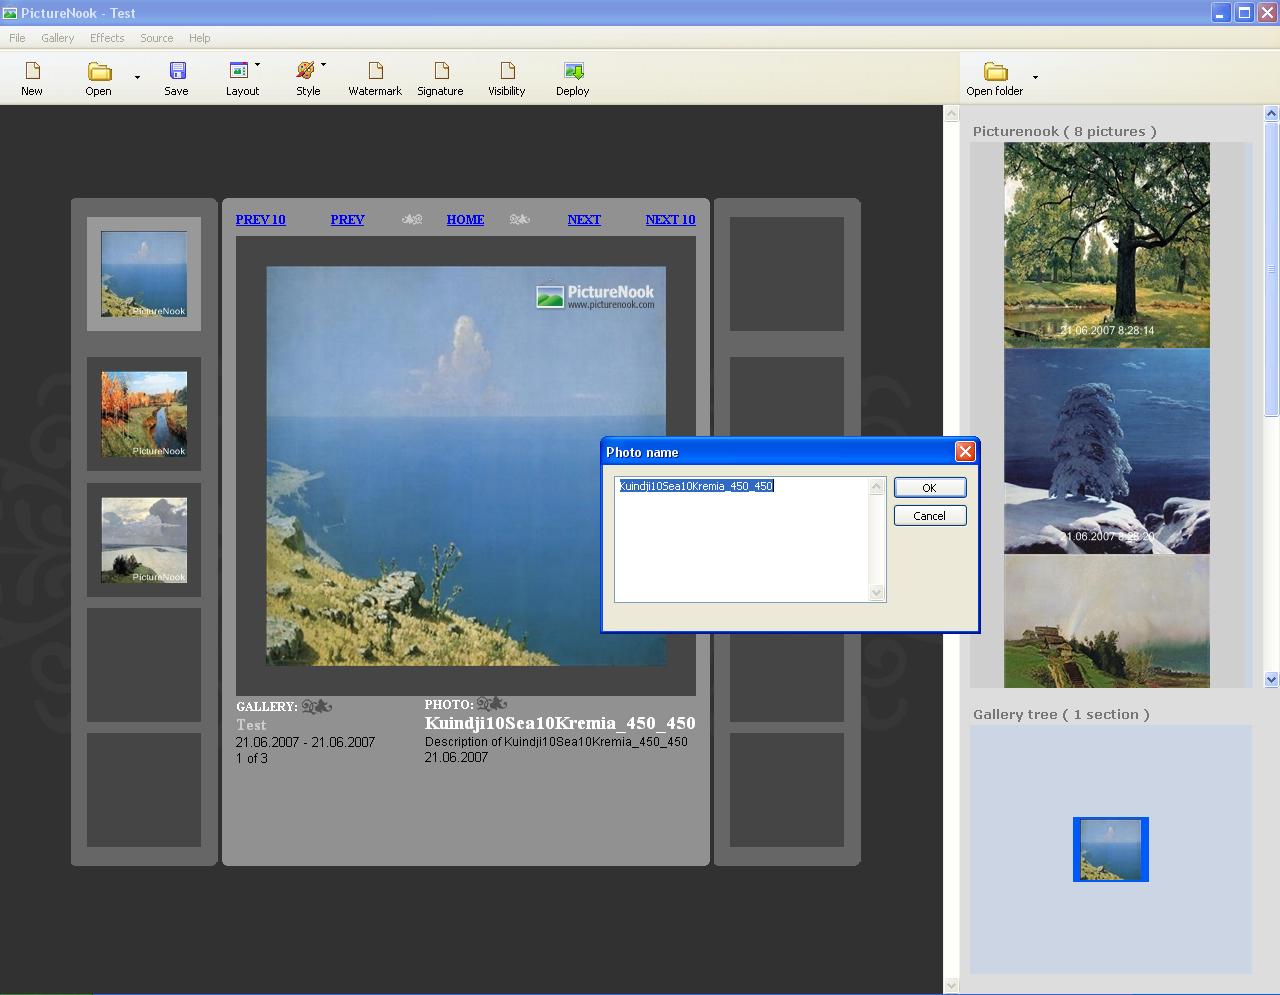
Replace "Photo name" with
<%textspan name="Photo name" property="main.name" default="<%=main.file_name_base%>"%>
Replace description of the picture with
<%textspan name="Photo description" property="main.description" default="Description of "<%=main.file_name_base%>" multiline="true"%>
Replace picture date with
<%textspan name="Picture date" property="main.creation_time" default="<%=main.file_creation_time%>"%>
Changed index.htm can be found at
usefulstuff/newlayout/index.htm
.
Run picturenook, now all information elements are "live". Result should look similar to the picture below.
This will be our basis for the next chapter
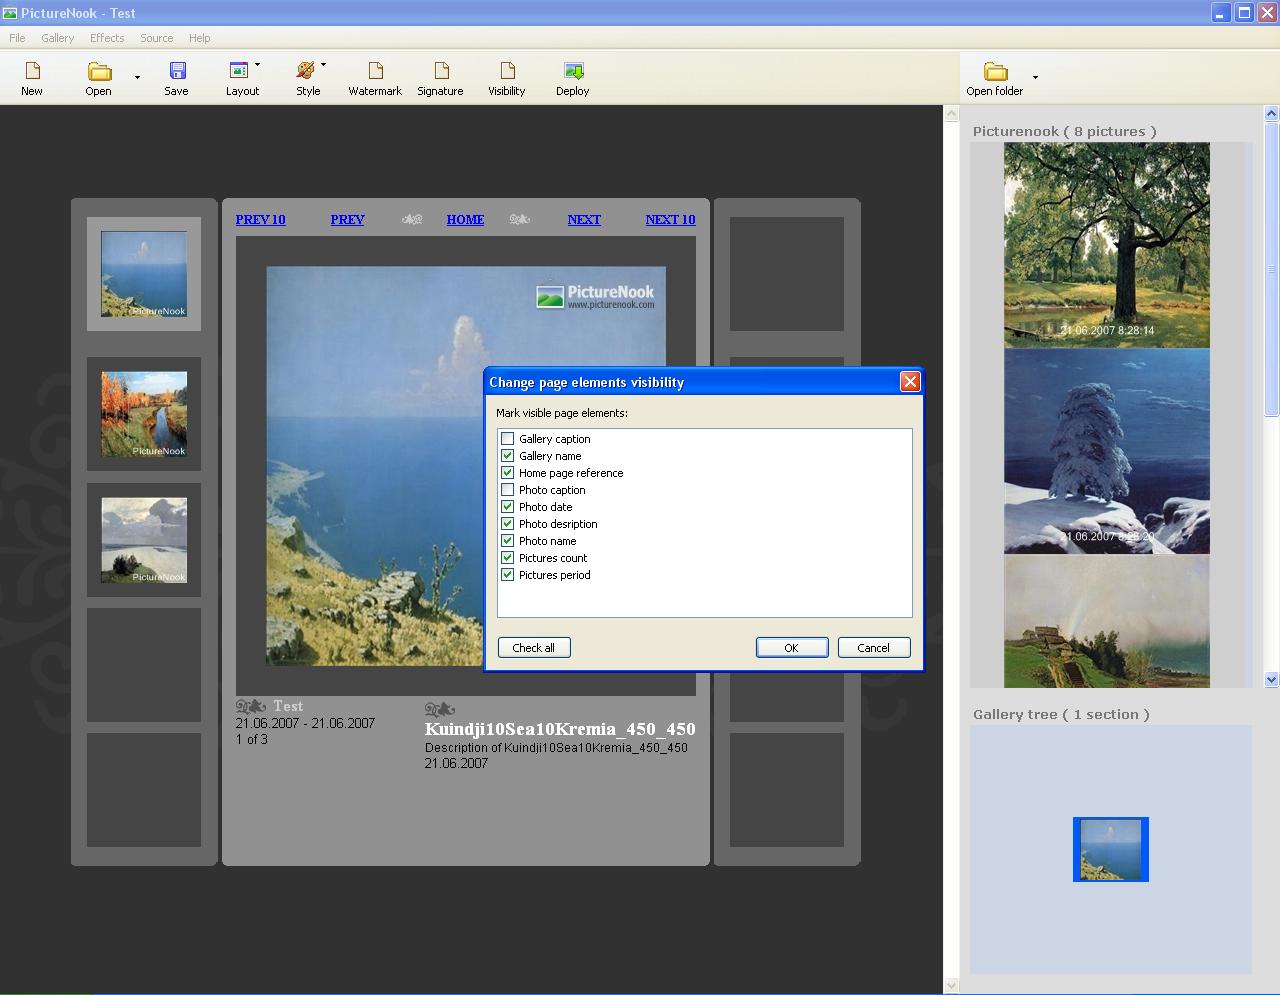
User of your template can control visibility of arbitrary parts of picture by placing them inside special tags.
This is useful when you want to allow user to hide pictures count, gallery caption and so on.
To control visibility, put everything you want to be hidden/shown inside these tags
<%if <%isvisible layout="Name"%>
    ...
%><%else
    ...
%>%>
Value of "layout" element, in our case "Name", will appear in visibility dialog. "else" part can be omitted, giving the shorter form:
<%if <%isvisible layout="Name"%>
  ...
%>
You can use these operator with same value of layout element, in our case "Name", several times, creating different formatting depending on user's choice.
Changed index.htm can be found at
visibility/newlayout/index.htm
.
Run picturenook, now you can control appearance by making some parts of layout hidden. Result should look similar to the picture below.
This will be our basis for the next chapter
Picturenook™ has built-in slide-show functionality. You can plug it into your layout as well.
To do it, find large.htm file in one of existing template folder, for example
blog and copy it to your NewLayout folder.
Edit xml inside your NewLayout.xml file. Add additional "page" element as shown below.
Sample of the file can be found at slideshow/files/newlayout.xml.
Now run Picturenook™. If you click main picture, slide show page will appear. Result should look similar to the picture below.
This will be our basis for the next chapter
ChapterĀ9.ĀHow to reuse standard style for your layout
By default, then you create layout, you can use only your custom style with your layout.
However, if you want to support common Picturenook styles, like “Black”, “Blue”, “Gray” or “White”,
you can do it. Of course, this requires some changes in your layout.
First, you have to learn what is included in these styles.
You should open Styles folder in Picturenook installation folder, and get yourself familliar with contents of each “style” folder.
Next, you have to modify your layout to refer to standard style's graphic elements.
For example, if you have placeholder for graphical “prev” link, instead of your graphic elements, you should refer to “prev” graphics from standard style, like this:
<%=page.styledir%>prev.gif
Also you could refer to css styles defined in standard style style.css file.
Finally, you should declare that your layout supports standard group of styles. To do so, you have to modify your
newlayout.xml file. Standard style belongs to “standard” group, and you can see it, if you open
one of standard style declaration files, for example, black.xml.
<?xml version='1.0'?>
<style css="style.css" name="Black" folder="Black" group="Standard"/>
Simply add group declaration to your newlayout.xml file, as follows
<?xml version='1.0' ?>
<template name="My Layout" folder="NewLayout" group="Standard">
<layout>
  <page file="index.htm" multipage="1" picture_list="content"/>
</layout>
</template>
Run Picturenook™, now you can select any standard style for your custom layout.
This will complete guide to layouts creation
Built-in Objects
- content
The content object supports following properties:
- gallery
The gallery object supports following properties:
- page
The page object supports following properties:
- picture
The picture object supports following properties:
Special Elements
- imgref
Used to create editable image hyperlink.
- pageheader
Used to support design mode.
- picture
Used as placeholder for gallery pictures and thumbnails.
For thumbnails
For main image
- relative_page
Used to refer to gallery pages from current page
- relative_page_block
Used to refer to gallery pictures from current picture
- textref
Used to create editable text hyperlink.
- textspan
Used to create editable block of text.
Layout Control
- isequal
Used to compare two values for equality.
In this example, if filename of picture with id "ref1" is equal to filename of picture with id "mainpict",
result output will look like "class=selected_border" else "class=border"
- isvisible
Used to test element for visibility.
In this example, if element "Image name prompt" is visible, "Picture:" text will be inserted in the result html
AppendixĀA.ĀObject Properties
The main feature of built-in objects is their ability to store arbitrary number of user-defined properties.
Let's look at two examples of how user-defined properties are used.
Some layouts include "PHOTO: " caption. Making it changeable is done via user-defined property.
To declare property, you have to refer to it in, for example, textspan element.
<%textspan name="Photo caption" property="gallery.photo_caption" default="PHOTO:"%>
As you can see above, we placed "Photo caption" textspan element with default text "PHOTO:" and declared
new property of "gallery" built-in object named "photo_caption". This means that then user changes textspan text,
it will be stored in gallery.photo_caption property. Thus, user can change default "PHOTO:" text to "PICTURE:"
Once defined inside textspan element, this property can be referred in other places on the page in the form:
<%=gallery.photo_caption %>
Note that gallery object holds gallery-wide properties, which have the same values across all pages in the gallery.
Making picture name changeable is also done via user-defined property. Now it is created in picture object
<%textspan name="Photo name" property="main.name" default="<%=main.file_name_base%>"%>
Somewhere on the page we have picture element with id equals to "main".
We placed "Photo name" textspan element with default text equals to "main" picture filename without extension.
We also declared new property for "main" picture object named "name".
Thus, by default picture name is equals to picture filename. If user changes it for particular picture,
new name will be stored in picture.name property.
Once defined inside textspan element, this property can be referred in other places on the page in the form:
<%=main.name %>
Note that this property is stored for particular picture, the one where this property was changed, thus user can set name for each picture.